
Your daughter has a small (or not so small) stack of patches she’d like put on her vest. Great! Here’s some quick guides to help you get them in the right spot.
Click here for a guide on where all of the badges, patches, and pins go.
Notes:
- Not all of the badges and pins are shown in the guides linked above. If you aren’t certain where something goes, ask her leaders or email info@SimiValleyGirlScouts.org.
- If you don’t see a patch shaped like one your daughter has, it’s probably a “fun patch”. Click here for examples of fun patches and where to put them.
- On the side with the troop number, badges go in the next open
 “spot”, beginning at the front bottom edge. The next badge earned goes to the left of that first badge until no more badges will fit on that row. Then you begin the next row up.
 - For the Brownie badges: If putting the badge in the next spot would mean putting it on upside down, you can skip a spot so the badge can be right-side up. You can fill in the skipped spot later.
- If your daughter has a sash, badges are often placed on the back of the sash and journeys on the front as there is so little room on a sash. Please note, Journeys are being discontinued in July 2026.
- If she is bridging to a new vest or sash, check out our guide for new vests for tips and a list of which pins to move to her new vest.
- Brownies and Juniors can wear one “Bridging to…” arc on their
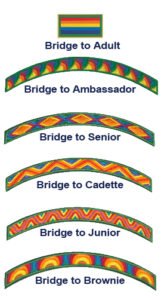 vest. Cadettes and higher wear the same vest for seven years and may end up with 3 “Bridging to…” arcs on their vest as they move from Cadette to Senior to Ambassador. Please note that the Arcs are earned. Simply moving to the next level does not earn the Bridging arc.