Category Archives: Uniforms

Girl Scouts Highest Awards

The Girl Scout Bronze, Silver, and Gold Awards prove you’ve got what it takes to build a better today—and tomorrow.

Picture of a piece of craft foam with the post of a pin sticking through it. The picture was taken on the back side (the inside) of a vest.

Preventing Lost Pins

Pins fall off and get lost all the time.
Read on to discover one of the main reasons why this happens and easy steps you can take to prevent it!

Wondering where that pin goes?  We have a whole section for that!

Step 1: Take up the extra space

“Tie Tack” type pins are meant to go through many layers of fabric, not just one.  As girls run and jump, the vest material bangs into the clasp, slowly working it off.
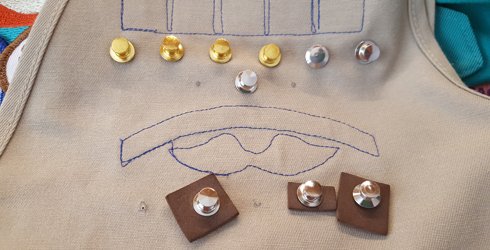
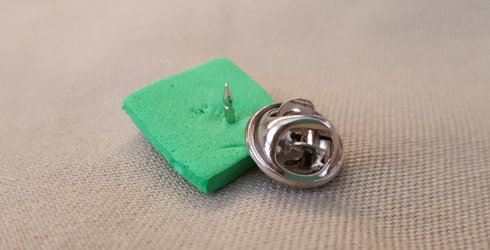
To fix this, add a small piece of craft foam or felt before you put on the clasp.  That helps keep the vest from banging into the pin back and it helps keep the pin right way up.  Win-win!


Step 2: Pick one of these three methods to secure that pin

Method 1: GLUE

(1) Put the pin in the correct place but don’t put the back on yet.
(2) Put a small amount of silicone glue or hot glue on the pin’s post.
(3) Put the back on.
The glue will help hold the back on but the back can still be easily pulled off if you need to move the pin.  Be aware, if you use too much glue, you may stain her vest.  Also, do not use permanent glues like super glues or jewelry glues.  You will not be able to take the pin off.

(Note: There are many brands of these type of glues.  We don’t recommend any one brand over another – use the one you like best.)

Method 2: SEWING – yes… SEWING on a pin

(1)  Use permanent glue to glue a small piece of felt to the back of the pin.
(2) Put the pin in the correct place and add the pin back.
(3) Use needle and thread to sew through the vest, catching the felt on the back of the pin.
(4) Take a few stitches through the pin back as well so it can’t fall off.

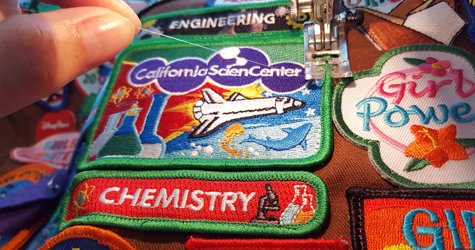
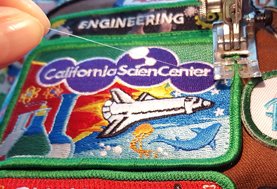
You can also sew the pin directly on to the vest.
(1) Run at least two stitches over the front of the pin.
NOTE: Use thread that matches the pin or use invisible thread for the best finished appearance.
(2) Don’t forget to take a few stitches through the pin back as well so it can’t fall off.

As a bonus, sewing on the pins helps keep the pin the right way up!

Method 3: DIFFERENT PIN BACKS

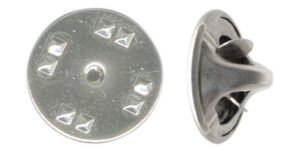
Did you know the standard pin back or “clasp” has a nickname?  It’s also known as a “frog”.  Perhaps because it likes to jump off the back of the pin!

Another way to prevent pins from getting lost is to switch to different pin backs.  There are several choices available.

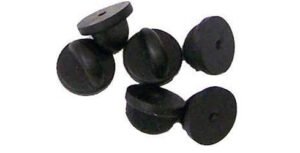
Rubber pin backs work well for many people.  They come in a variety of colors and shapes.  The quality can also vary so be sure to buy some with good reviews.

There are two types of “Locking” pin backs.

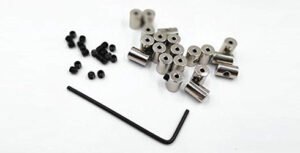
Barrel backs have a small “set screw” in the side.  They come with a tiny allen wrench to tighten the screw firmly against the post of the pin.  They work well but you need to be sure to not over-tighten (and break the post) and you need to make sure you don’t lose the wrench.

Tool-less backs have a “plunger” action.  You pull up on the back edge as you push the pin back down over the post.  Once in place, you release the “plunger” to secure the pin back.

One last tip!  Sometimes you will need to remove pins and getting them back in the right spot can be tricky.  Once you have a pin placed just right, take a moment to mark where it goes.  Turn the vest over and use a ballpoint pin or a sharpie to mark around the post.


Picture of a patch that has been machine sewn on with invisible thread.

Attaching Badges & Patches

What’s the best way to attach a badge or patch?  Whatever way works for you so your daughter can proudly display the badges she’s earned.

STEP ONE:
ALWAYS wash a brand new vest or sash before attaching any patches.

STEP TWO:
Pick a method for attaching the patches.  Several are listed below.

MACHINE SEWING
A sewing machine really speeds up the process and is easy to do.  Here’s some tips:
Use a basting spray (sold in the quilting section) or painter’s tape to hold the patch in place while you sew.
Use invisible thread for the top thread so you don’t have to worry about matching your thread to the color of the patch.  If you use a light colored thread or a contrasting thread for the bobbin, it makes unpicking easier if you need to move a patch later.
When you reach a corner and need to turn, stop sewing with the needle in the “down” position, raise the pressure foot, and turn the vest.  Lower the foot and continue sewing.

HAND SEW
Hand sewing isn’t hard! Here’s a few tips to help you out:
Don’t try to push your needle through an iron-on patch;  that backing is really thick!  Instead, catch the binding threads around the edge of the patch with your needle and sew those down.
Use invisible thread (it’s like really fine fishing line) so you don’t have to worry about matching  your thread to the color of the patch.

BADGE MAGIC
Many craft stores sell a product called “Badge Magic”.  You can buy it pre-cut for Girl Scout badges or buy it in sheets that you cut yourself.  Stick a piece the same size and shape as the badge to the back of the badge, peel off the backing, and stick it to the vest.  Badge Magic has mixed reviews – some people have good luck, some have patches fall off fairly quickly.  If you use it, we suggest adding a couple of hand stitches to the top corners of the patches to help keep them from getting lost.

IRON ON
Most badges and patches can be ironed on but they may not stay 
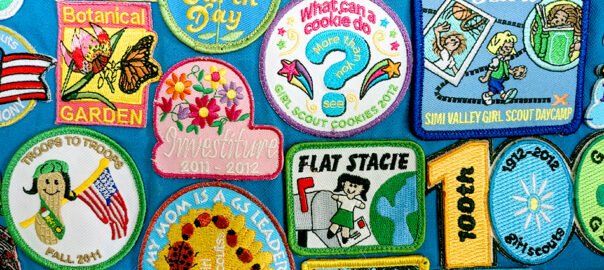
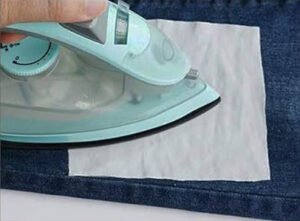
very well. If you plan to iron them on, be sure to follow the directions on the package carefully.  We also recommend adding a couple of hand stitches to the top edge of the patch so if the iron-on backing fails, she doesn’t lose the patch.

HOW TO WASH A VEST OR SASH
Vests and sashes with all of the badges and patches sewn on can be machine washed and dried as needed.
Vests with any ironed-on, stapled, or “sticky back” attached patches should ALWAYS be hand washed and line dried.
No matter which washing method you use, be sure to remove all of the pins first.  Before removing the pins, turn the vest over and use a pen to mark the fabric where each pin should be.  Then take a quick photo of the front so you know where the pins go when you put them back on.  That helps you put them back on quickly.  Click here for our tips for keeping pins from falling off.

IF YOU ARE REALLY STUCK FOR HOW TO MAKE THE PATCHES STAY PUT
Consider asking for help.  Many parents in town will sew badges on for you – either by hand or by machine – for a minimal charge.  Ask your troop leader or email us at info@simivalleygirlscouts.org for help finding someone who sews.

UNCERTAIN WHICH PATCHES AND PINS GO WHERE?
We have a page on just those questions!  And as always, please feel free to ask for help.

SOME LAST ADVICE FOR DAISY JOURNEY SETS
Three of the Daisy Journeys have multiple part patch sets.  There is a background patch and three little patches that go on it to form a scene. The best advice is to attach the little patches to the big, background patch BEFORE you attach it to the vest.
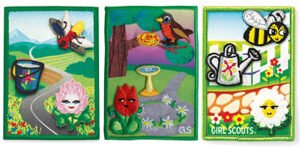
Do not try to iron these little patches on – you will ruin the background patch.  Your best bet is to sew them on to the background patch.  Next best option is a Badge Magic type product.

Where do all of those patches and pins go?

Your daughter has a small (or not so small) stack of patches she’d like put on her vest.  Great!  Here’s some quick guides to help you get them in the right spot.
Click here for a guide on where all of the badges, patches, and pins go.

Notes:

  • Not all of the patches are shown.  If you aren’t certain where something goes, ask her leaders or email info@SimiValleyGirlScouts.org.
  • If you don’t see a patch shaped like one your daughter has, it’s probably a “fun patch”.  Click here for examples of fun patches and where to put them.
  • On the side with the troop number, badges go in the next open 
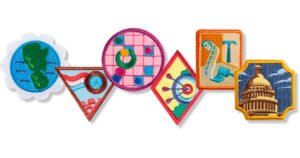
“spot”, beginning at the front bottom edge.  The next badge earned goes to the left of that first badge until no more badges will fit on that row.  Then you begin the next row up.
  • For the Brownie badges: If putting the badge in the next spot would mean putting it on upside down, you can skip a spot so the badge can be right-side up.  You can fill in the skipped spot later.
  • If your daughter has a sash, badges are often placed on the back of the sash and journeys on the front as there is so little room on a sash.
  • If she is bridging to a new vest, check out our guide for new vests for tips and a list of which pins to move to her new vest.
  • Brownies and Juniors can wear one “Bridging to…” arc on their 
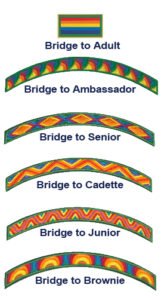
vest.  Cadettes and higher wear the same vest for seven years and may end up with 3 “Bridging to…” arcs on their vest as they move from Cadette to Senior to Ambassador.  Please note that the Arcs are earned, simply moving to the next level does not earn the patch.

Fun Patches

If you don’t see the patch, or any patch that looks a lot like it, in the patch placement guide for your daughter’s level, it is probably a Fun Patch.

Fun patches go on the back of the vest (or on a jacket or blanket) and become a scrapbook of memories for all of the fun things that your daughter has done as a Girl Scout.  Fun patches can also be put on a jacket or a blanket.

How do girls get fun patches?

  • Many Girl Scout events include a fun patch for the girls who attend.
  • Girls can earn fun patches by participating in the Fall or Cookie sale.
  • Troops may vote to use some of their funds to purchase fun patches as a remembrance of fun things the troop does.
  • Girls can also earn fun patches on their own by completing educational programs through Girl Scouts, the National Park Service’s Junior Ranger program, and other organizations.

So Many Badges to Earn!

There are a wide variety of badges that even our youngest Girl Scouts can earn.

Girls can earn badges with their troop and they can earn them on their own.  You’ll find guides for earning the badges online in the Volunteer Toolkit.

In addition, girls may earn awards from their church and girls can participate in the Presidential Volunteer Service program.

The charts below show all of the badges for each level, as of Fall 2020.  This includes the new badges released on July 21, 2020.

You can find all of the badges in the Girl Scout Badge Explorer.

Girl Scouts also has the unofficial rule of “Once a Badge, Always a Badge”.  This means girls can earn old, retired badges.  Brownies earned Try-its while Juniors earned Badges.  Cadettes, Seniors, and Ambassadors all earned Interest Projects or IPs.  If you search online, you can find the instructions for how to earn specific badges.  You can purchase them on sites like eBay, through various Facebook Girl Scout groups, and other places online.

New Vests

Getting a new Girl Scout vest is exciting!  And it can be a bit confusing for parents.
Here are some tips to help:

  • Always wash a new vest before adding any patches.
  • Be sure to write your daughter’s name on the tag or somewhere else on the inside.
  • Place the Flag, Council patch, and troop number as high on the vest or sash as you can. This leaves more room below them for badges.
  • These are the pins that are moved from her old vest to her new vest:
    – World Association of Girl Guides and Girl Scouts pin (WAGGGS)
    – Girl Scout membership pin (Junior and older)
    – Gold/Silver/Bronze Awards
    – Any Summit Awards
    – Membership Stars
    – Lifesaving awards
  • The following pins do NOT move up to her new vest:
    – Cookie Pins
    – My Promise/My Faith Pins
    – Safety Awards
    – President’s Volunteer Service Award
    – Any other pins not mentioned in the above lists

Click here to download our handy shopping guide so you’ll know what questions to ask her troop leader and which patches and pins to purchase for a brand new vest.

Be sure to check out the other information on our “Uniforms & Badges” page.  You’ll find helpful guides that show where everything goes and tips for getting the patches and pins to STAY on the vest.